Pressure adjustment with voltage multimeter

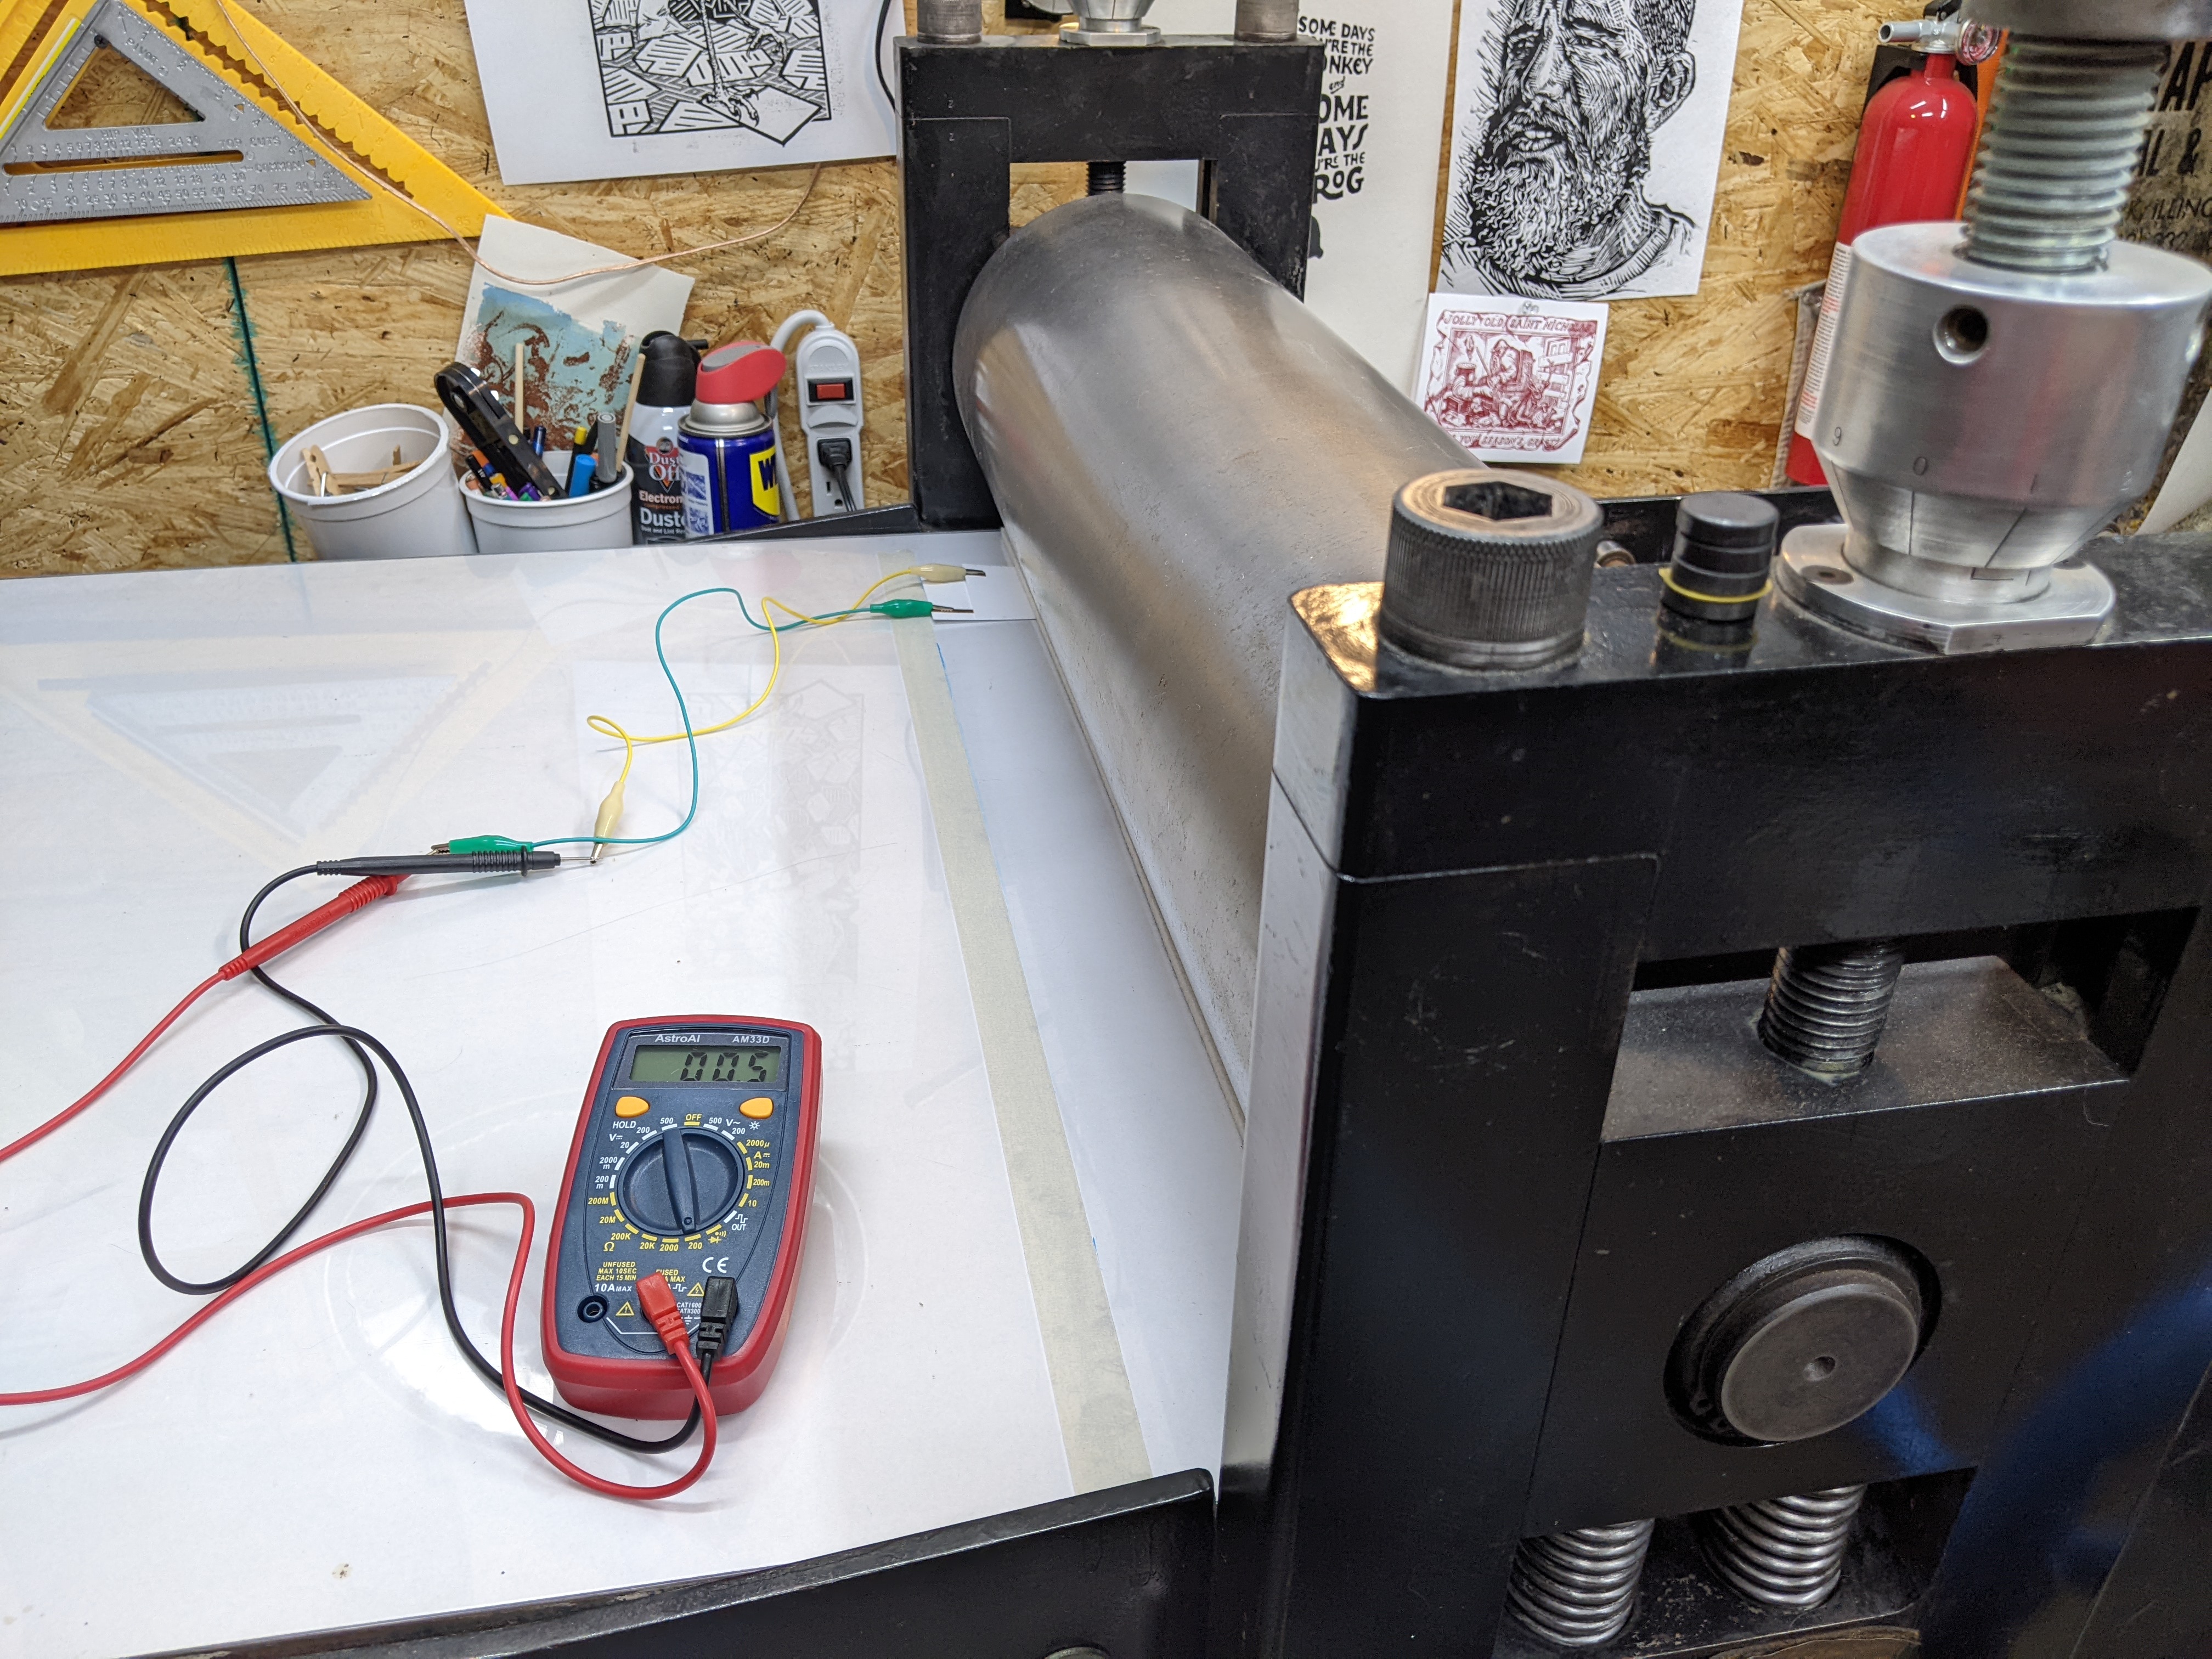
What you see in the image above is a setup for calibrating a press with or without micrometer gauges. The usual procedure for calibration is to zero out the gauges by taking the roller to the bedplate and then setting the micrometer barrel & thimble to zero. The problem is that the roller isn’t just resting by gravity on the bedplate, it’s tightened down there by screws which can be out of level.

I thought up this method around Christmas 2021 when I couldn’t sleep one night. It uses a few pieces of Velostat film, some copper tape, card stock, and a multimeter. Velostat is used in packing electronics to avoid static discharge. It’s a plastic impregnated with carbon and it becomes more conductive when pressure is applied. Many artists and makers use this property to create all sorts of things so this isn’t exactly new. I’ve never seen it applied to this task though.

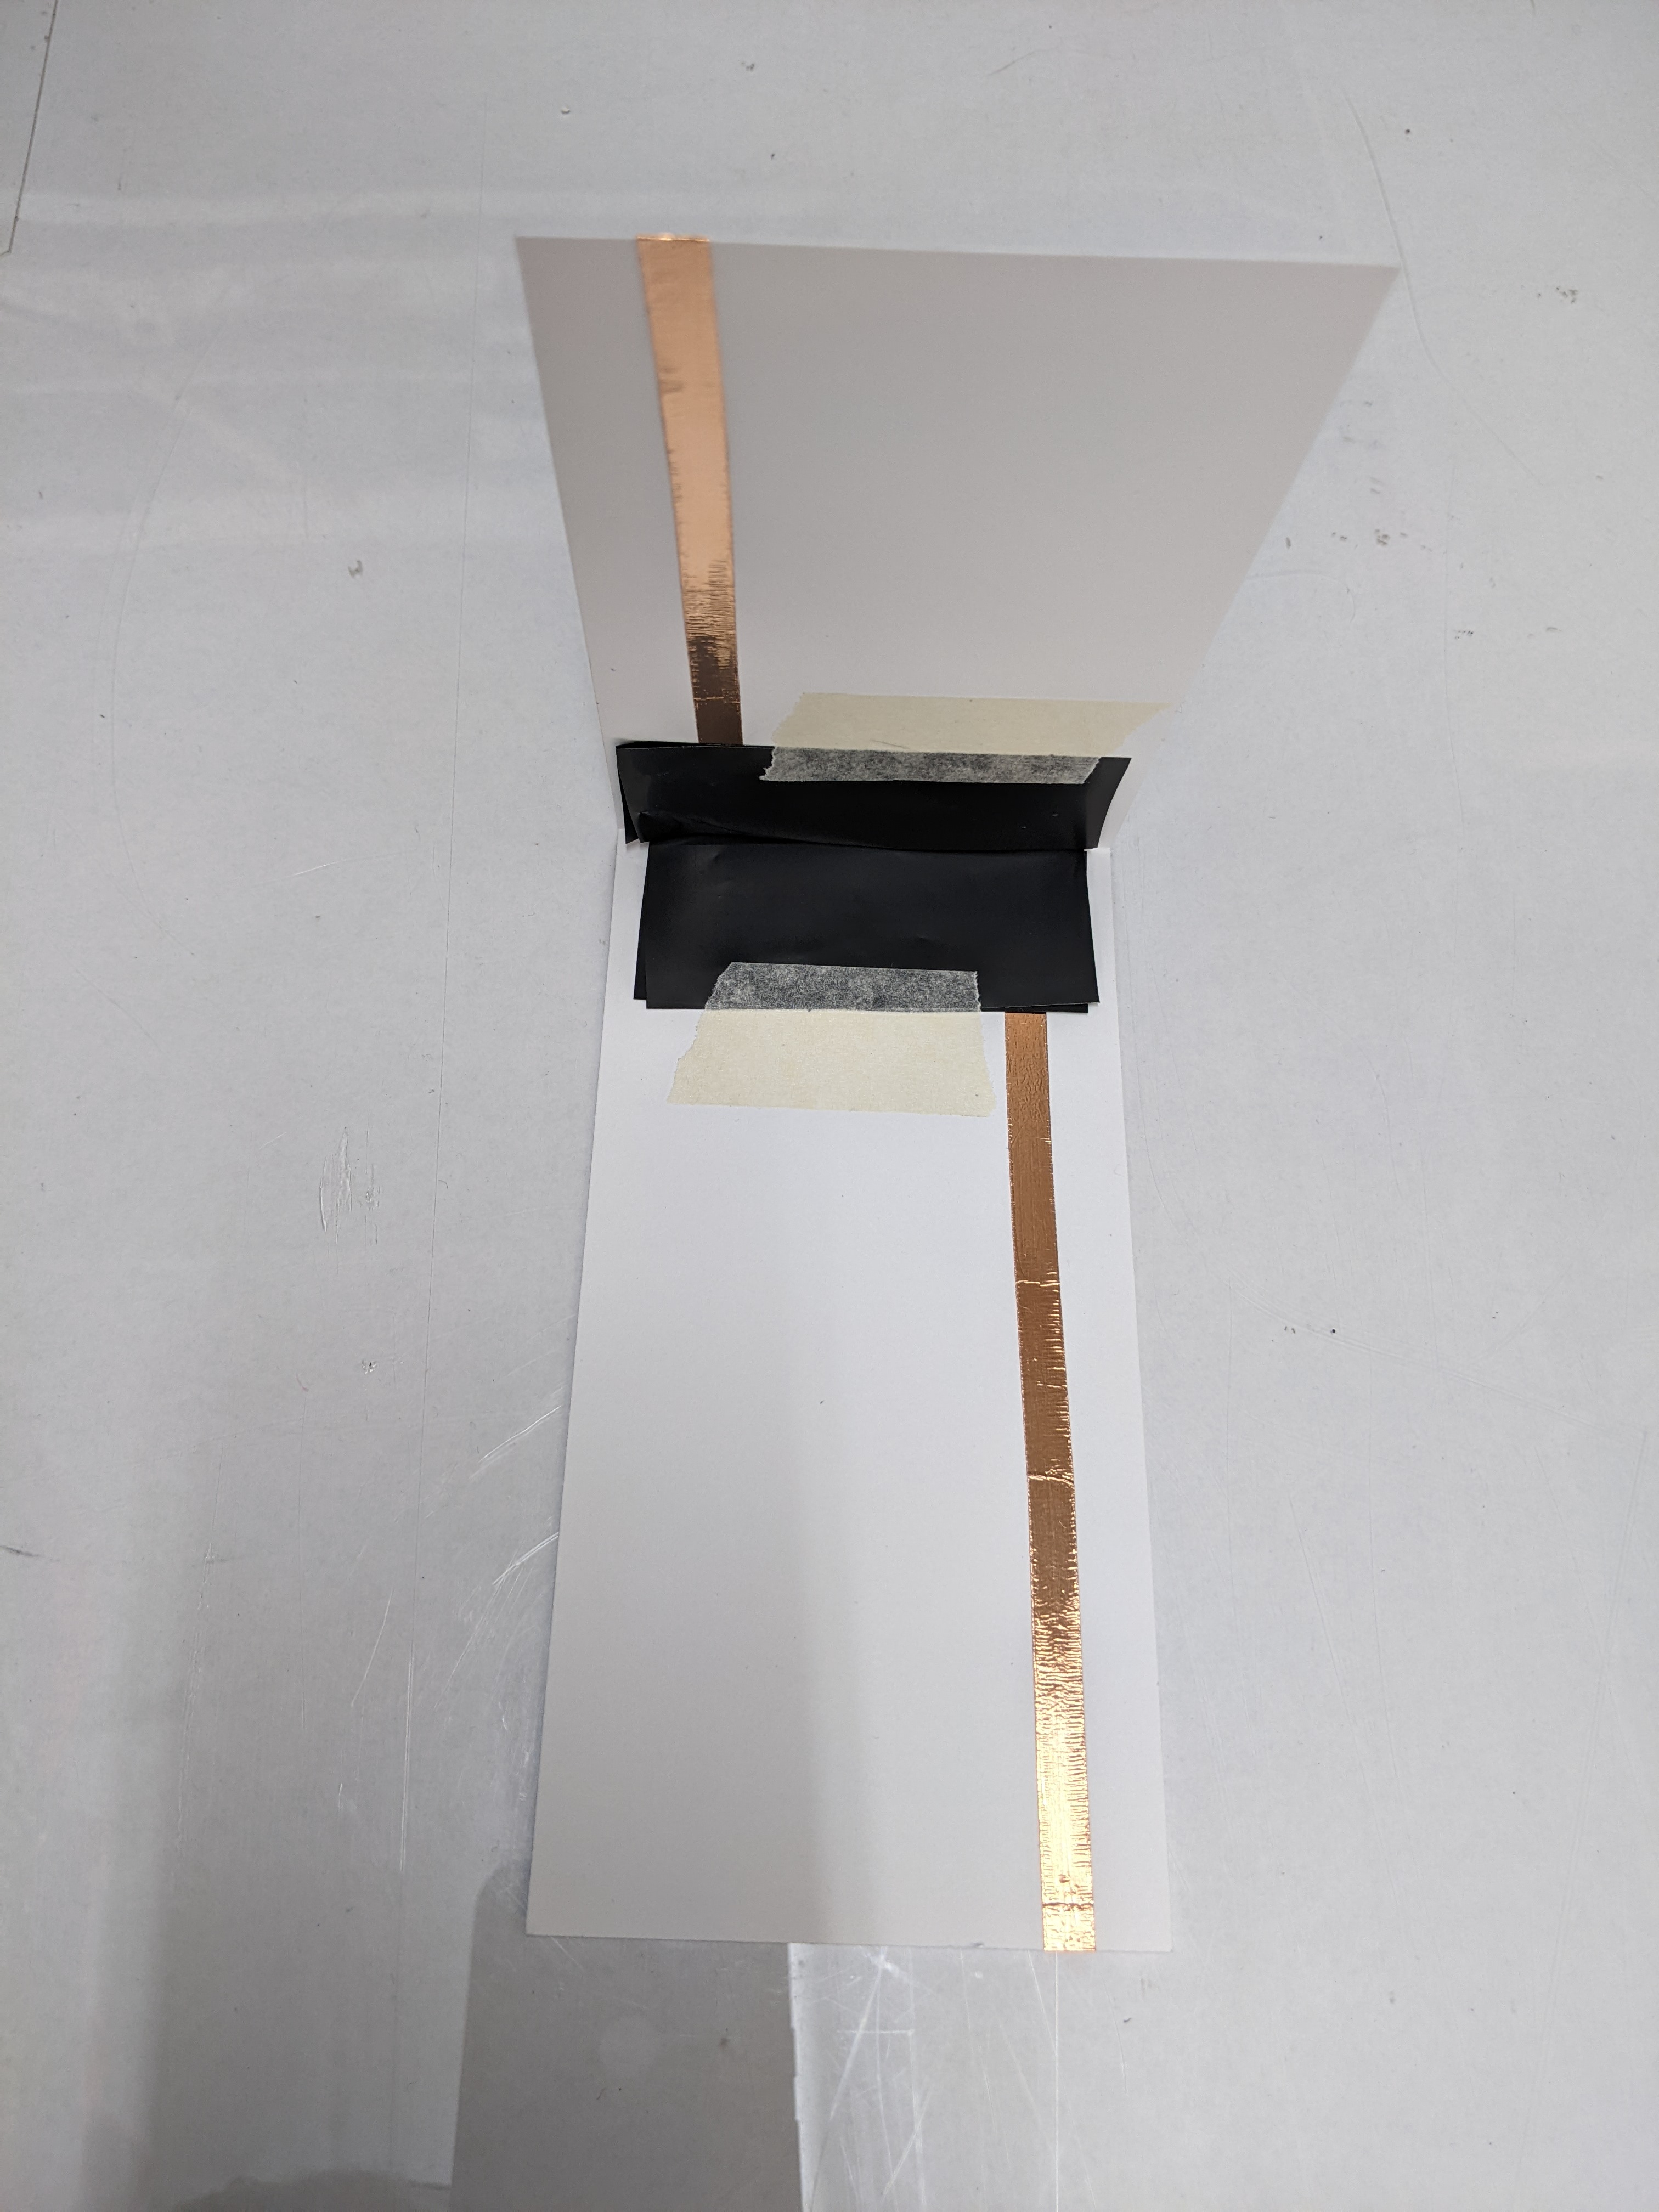
The image below shows the simple sandwich of card stock, copper tape, and velostat. I’ve had good results by marking a line on the press bed parallel with the roller, allowing me to insert the velostat sandwich under a scrap of felt to the same depth along the roller’s width. I then roll the bed under the roller to a marked point. I do this on each side of the roller and measure the voltage.

Aluminum Stearate Paste

Some pigments may need some help in mulling a workable paint. A higher acid value oil such as Pale Grinder’s Oil is a good start, but if that still doesn’t do the job, a little stearate paste can be used. This is often used in commercial paint to gel the oil which prevents pigment settling, increasing shelf life. In low quality paint, its overuse as an adulterant leads to a greasy feeling paint.

Heat 250 ml linseed oil to 150° C (300°F)
Gradually stir in 50 grams of aluminum stearate powder

This heated solution can be poured into an empty tube or caulking gun cartridge. It will gel on cooling so it can be squeezed from the tube much like paint.

1 part of this solution may be added to 4 parts linseed oil, by weight, for pigment grinding.

Reference:
https://cool.culturalheritage.org/waac/wn/wn23/wn23-3/wn23-304.html

Biscuits

  • 3 C self rising flour (Hudson Cream if you can find it) Sift if it clumps at all.
  • 1 teaspoon baking soda (this baking soda and powder isn’t really necessary if you’re using self-rising flour, but I just add some extra leavening because I want those biscuits tall)
  • 1 teaspoon baking powder
  • Pinch kosher salt
  • 1 stick of unsalted butter
  • 2 C (1 pint) buttermilk or enough to make a workable dough. Kefir works too.


Mix dry ingredients. Quarter the butter lengthwise, and flour the pieces so they don’t stick together. Cut the butter into tiny pats and toss them into the flour. The butter can also be frozen and grated but I didn’t like the texture of the resulting biscuit. Add buttermilk and mix lightly. Turn this very wet dough onto the floured counter and spread a bit. Sprinkle flour into it as you fold it onto itself and press it out again. You’ll want about a cup of flour handy on the bench for dusting. These sprinkled layers of flour make the biscuit cleave readily into two halves when baked.


When cutting your biscuits, a simple metal cutter is best. Cups or jars will press the dough and hinder raising. Also, just press straight down and come back up, no twisting. This also hinders raising. Place your biscuits touching. Even a biscuit needs a little help from its friends.


Bake at 450 degrees F for 15-20 minutes or until browned on top.
Makes a baker’s dozen.

*pro tip: use a baking tray with a lip so that butter won’t melt out into your oven. You want to keep any butter on the tray so you get that crispy bottom!

Butter, cut lengthwise, powdered with flour so it doesn’t stick, and cut into tiny pats
Hudson Cream flour in the background. Dough in bowl before being turned out onto the bench.